
Automating Annotation Tags with Annotation Keys
Annotation keys automatically associate your annotations with specific tags, making it easier to organize and categorize your research. This guide shows you how to create and use annotation keys in your libraries and assignments.
What is an Annotation Key?
An annotation key is a preset association between annotation types (like highlight colors) and tags. When you use an annotation key, your annotations are automatically tagged as you create them, ensuring consistent tagging across your research and saving time by eliminating manual tag entry.
Annotation keys are specific to the library or assignment where you create them. Each library and assignment can have its own annotation key.
Benefits:
Automatically tags annotations as you create them
Ensures consistent tagging across your research
Saves time - no manual tag entry needed
Supports complex categorization schemes (like Claim-Evidence-Reasoning)
Creating and Using an Annotation Key
This example demonstrates creating an annotation key that uses color-coded highlights for the Claim-Evidence-Reasoning (C-E-R) research method. (Research shows that color coding improves academic writing.)
To create an annotation key in your library:
Navigate to the library where you want to create the annotation key entries and select the Annotations tab.
Click Key to open the annotation key sidebar.
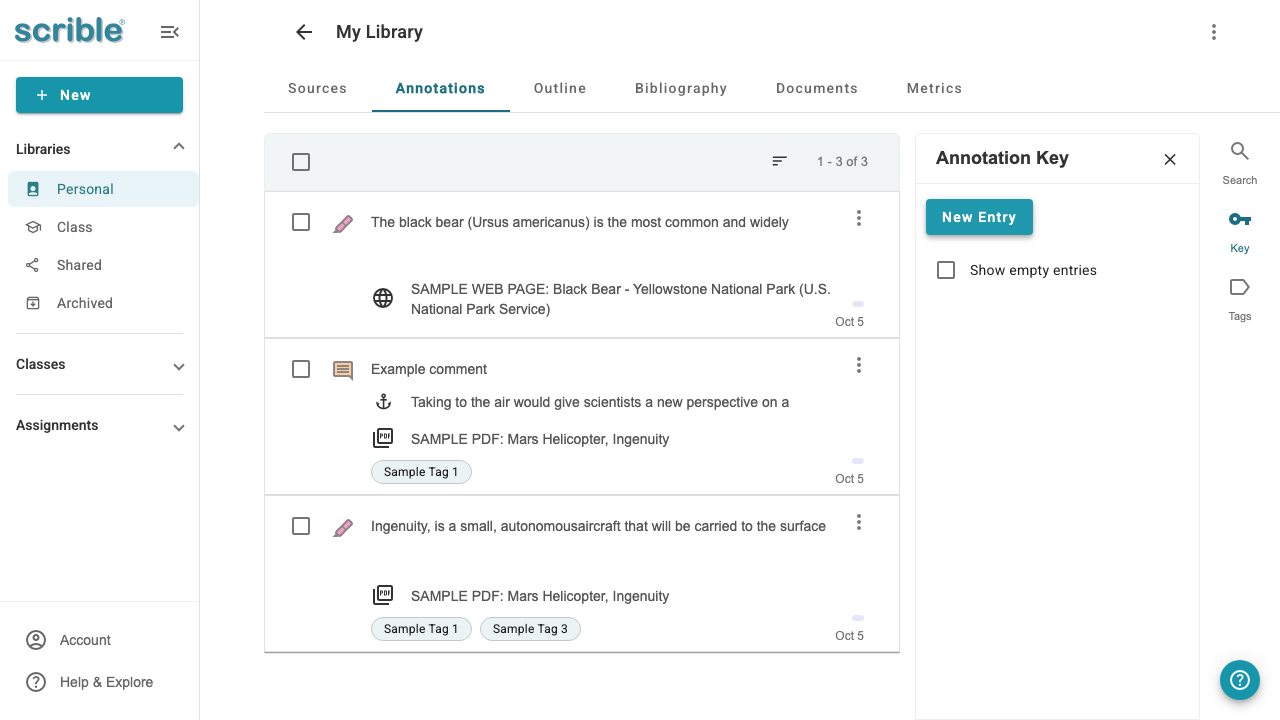
Click New Entry to create your first association.
-
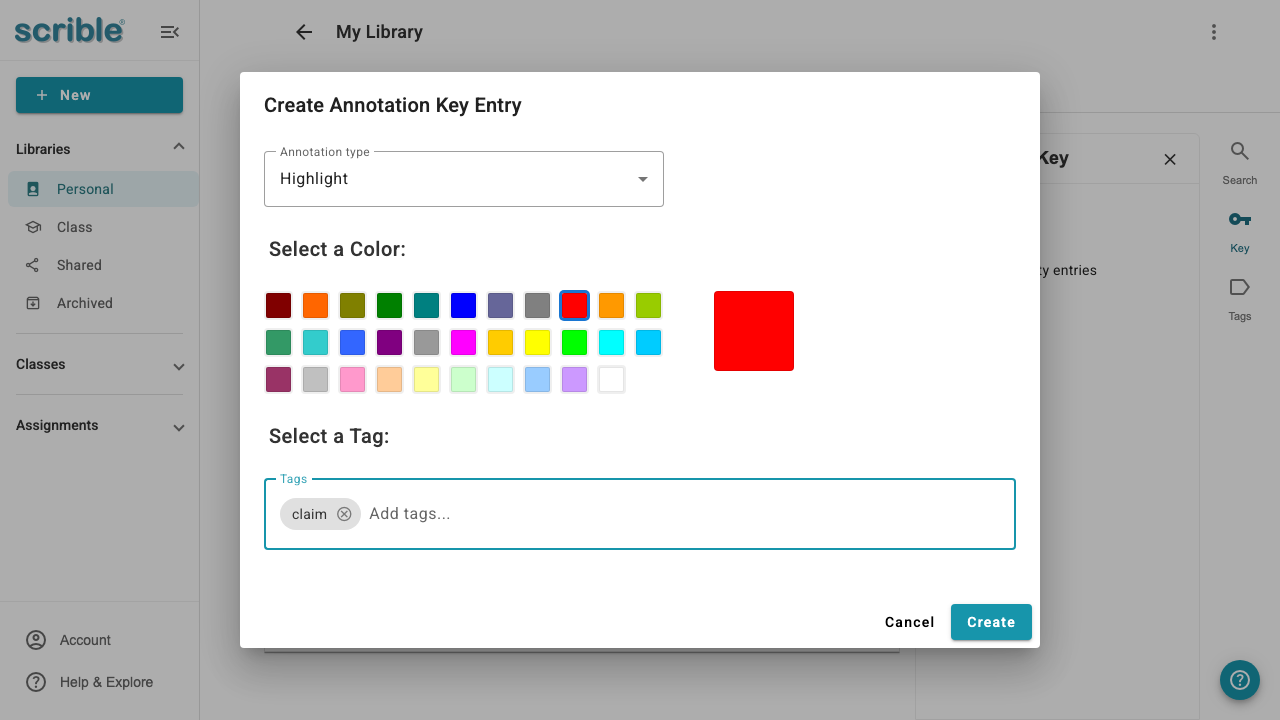
In the dialog that appears:
Select Highlight as the annotation type
Select a color (for example, red for "Claim")
Add the tag "Claim" (you can select an existing tag or create a new one)
Click Create
-
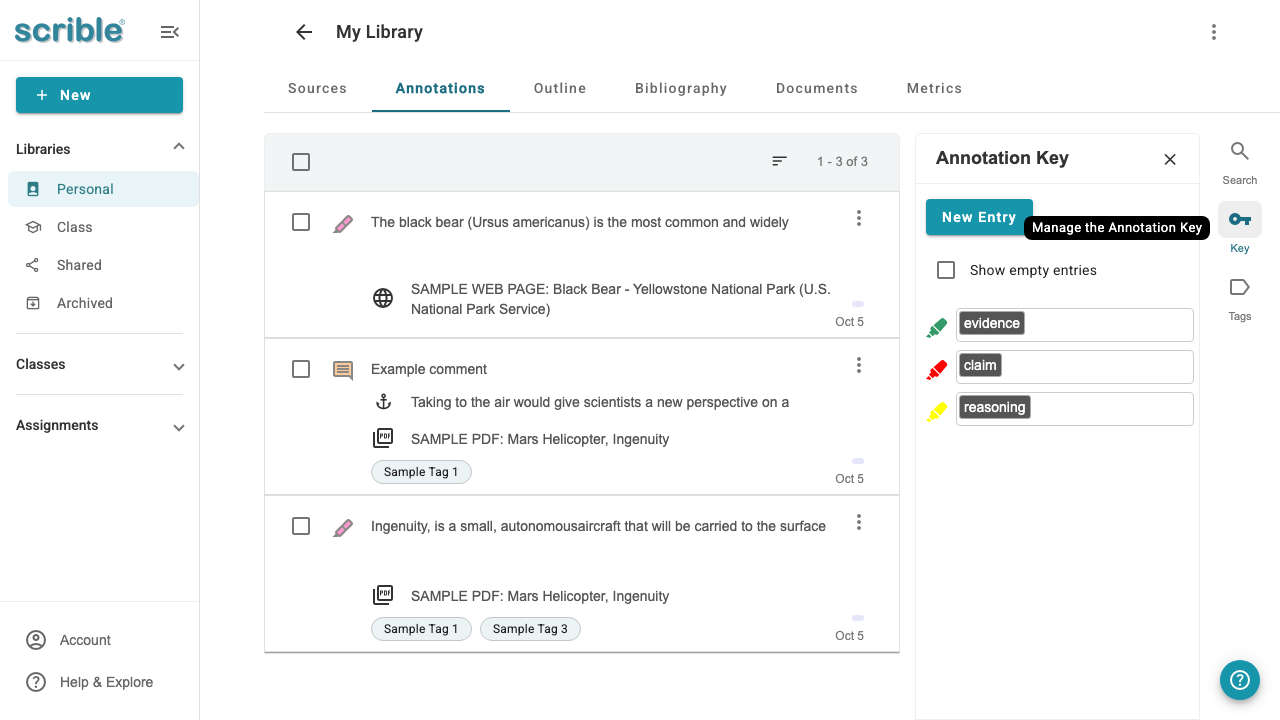
Repeat step 3-4 to create additional associations:
Green highlight → "Evidence" tag
Yellow highlight → "Reasoning" tag
Your annotation key is automatically saved as you create entries.
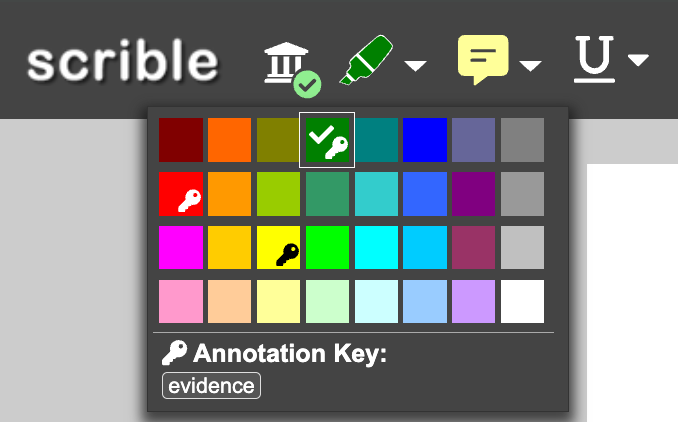
To use your annotation key:
When you highlight text in a source, the highlighter color picker shows your annotation key associations. Select the appropriate color and the corresponding tag is automatically applied to your annotation when you highlight with that color.
Creating and Using Annotation Keys in Assignments
Teachers can set up annotation keys when configuring assignments to provide structure for student work.
Benefits specific to assignments:
Provides guardrails: All students use the same highlights and tags, ensuring a consistent approach to annotating sources
Easier review: Teachers can quickly scan student work since categorization is consistent across all submissions
Where to find annotation keys in assignments:
When configuring an assignment with Sources & Annotations enabled, look for the "Create an Annotation Key?" option. The process for creating annotation key entries within an assignment is exactly the same as in libraries (same steps and workflow as described above), except that it is accessed from the assignment configuration stepper menu rather than the Key sidebar from libraries.
Tips
Versatility: Annotation keys work with other annotation types beyond highlights, such as bold and underline.